Sides

Last-Minute Scalloped Potatoes

Last-Minute Scalloped Potatoes

sl_scalloped_potatoes_006.jpg

For a decade or more, this has been my go-to potato side dish for summer barbecues all the way to holiday dinners. It’s not so much that this is a secret recipe, but more the fact that no one guesses this begins with frozen diced potatoes — you know, hash browns.

But that’s your secret, right? After you pour the frozen taters into the skillet, you add Parmesan, garlic, and cream, so that elevates the recipe a lot. And you let it bake enough to create a crusty, crispy, cheesy ring around the pan that is delicious along with the warm and gooey interior. Top with a little extra cheese and run under the broiler, or finish it with a layer of buttered bread crumbs that you let cook until golden before serving. This is one of the fabulous sides in my book, Skillet Love!


LAST-MINUTE SCALLOPED POTATOES RECIPE:

Makes: 8 servings | Prep: 5 to 10 minutes | Cook: 46 to 51 minutes

1 bag (32 ounces) diced frozen hash brown potatoes
1/2 cup grated Parmesan cheese
3 cloves garlic, minced
Salt and freshly ground black pepper to taste
2 cups heavy cream
1 tablespoon grated Parmesan
1/4 cup shredded Gruyere or sharp white cheddar, for the top, if desired, OR 1/2 cup soft bread crumbs tossed with 1 tablespoon melted butter, for the top

  1. Place a rack in the center of the oven, and preheat the oven to 400 degrees F.

  2. Empty the bag of hash browns into a 12-inch skillet. Stir in the 1/2 cup Parmesan, garlic, salt and pepper to taste, and cream until combined. Cover the skillet with a lid or with foil, and place the skillet in the oven. Bake until the mixture is bubbly, about 45 to 50 minutes. Remove the skillet from the oven.

  3. Turn off the oven and preheat the broiler. Uncover the skillet, and scatter the tablespoon of Parmesan and the Gruyere on top, and place the skillet under the broiler until the cheese melts and turns golden, no more than 1 minute. Remove and serve at once. OR, forgo the cheese, and scatter the buttered bread crumbs on top about 10 minutes before the potatoes are done. Return the skillet to the oven, and bake until golden brown.

Bebe's Green Beans

Bebe’s Green Beans

southern_veggies_013.JPG


I live in the land of the meat and three. That is Nashville's claim to fame - along with hot chicken and of course, country music. Meat and three means you pick one meat offering and a trinity of veggie sides to go with it. There's nothing profound about the history of this way of serving up hot southern food in restaurants and diners - it was an efficient method to keep the line moving, I suppose.

And this way of selling southern food surely is rooted in the home where you might have a pork chop or piece of fish and three vegetables alongside. My mother didn't think she had prepared an adequate meal unless there were at least three vegetables, plus hot bread and dessert. Those were the days...

However, we've woken up to the fact that the way we've cooked southern veggies may taste good but isn't good for us. My apologies to the southern chefs and authors who have espoused the gastronomic pleasure of greens dripping in pork fat, okra fried in bacon grease, and squash swimming in butter. I am going to tell you right here and now that there is a better way to cook those garden veggies, a way that respects their natural and local flavor, is still pleasing to the palate, and will have full approval of your cardiologist. If you are with me, read on. If not, go get in line at your favorite meat and three.

Lessons learned from the past

The reason green beans were originally simmered in pork fat is that fatty meat was available on a farm that raised hogs. The salty, rich flavor of the pork made those beans flavorful, and the fat made them substantial.

According to Virginia historian Leni Sorenson, southern food history is rooted in economy. "The poor didn't eat desserts, couldn't buy sugar... they made do with field peas." And she adds, "They wanted fat meat like pork for sustenance."

Those beans or peas simmered in a pot with water and pork was the main dish. That hog jowl, the fatback, whatever you call it, was added to give everyone the feeling of satiety. Plus, it added more calories to vegetables, which increased the amount of energy that could be expended in fields or factories until the next meal. But we don't live that way anymore, and there is a better and more delicious way to cook green beans.

Cook in as little water as possible

A modern way to prepare green beans is on top of the stove in just enough water to cover the beans halfway. They are cooked through and not crisp. Most importantly, they are free of animal fat. This is a method my mother developed out of creativity and the need to put something healthier on the dinner table. The uncanny mix of olive oil, onion, brown sugar, salt, and pepper gets magically smoky and seasons the beans in a most satisfying way.


BEBE’S GREEN BEANS RECIPE:

Makes 6 servings | Prep: 15 to 20 minutes | Cook: 20 to 25 minutes

1 1/2 pounds fresh green beans, trimmed
Water to cover halfway
1 cup chopped onion
1/4 cup olive oil
1/4 cup light brown sugar
Salt and pepper to taste

  1. Snap the trimmed green beans in half and place in a large saucepan. Add enough water to cover the beans only halfway. Add the onion, olive oil, brown sugar, and salt and pepper to taste - about 1/4 teaspoon each. Place the pan over medium-high heat, and bring to a boil. Reduce the heat, cover, and simmer until the beans are just tender, 20 to 25 minutes. Taste one of the beans to test for doneness. If you like beans cooked a little longer, keep cooking them until they are your desired doneness.

  2. Drain most, but not all, of the water from the pan. Season again with salt and pepper to taste. Serve, or let cool and store in the fridge until time to serve.


Grilled Eggplant Stacks

Grilled Eggplant Stacks

Eggplant recipes | Anne Byrn

Before my daughter’s wedding two years ago, we were looking for a first-place course for the reception dinner, a starter to the meal that could be plated and placed on the table in advance. It needed to be a course that was delicious at room temperature, and one that would actually improve in flavor as the seasonings and ingredients had time to mingle together on the plate.

Enter Eggplant Stacks!

It was this very recipe — a stack of grilled eggplant slices and tomato, seasoned with a fresh basil oil and adorned with crumbled feta. I love this recipe because it saved my day when planning that wedding meal, and also because it’s delicious any day, alone or alongside a grilled steak or piece of chicken. And when you’ve got really good tomatoes, one bite of this stack says summertime.


GRILLED EGGPLANT STACKS RECIPE:

Makes: 6 to 12 servings | Prep: 35 to 40 minutes | Grill: 7 to 8 minutes | Bake: 6 to 7 minutes

Basil Oil:
1 cup fresh basil leaves
1/2 cup olive oil
1/2 teaspoon salt

Eggplant Stacks:
2 large or 3 medium eggplants (2 to 3 pounds; 24 slices)
Salt and freshly ground black pepper
3 large tomatoes (for 12 slices total)
3/4 cup (6 ounces) crumbled feta cheese
Arugula, for serving

  1. Make the basil oil: Place the basil leaves, olive oil, and 1/2 teaspoon salt in a food processor. Process the basil until it is finely chopped. Line a sieve with paper towels and place it over a bowl. Pour the basil and oil mixture onto the paper towels and press gently on the mixture to extract the oil from the basil. About 1/3 cup of basil oil will seep into the bowl. Set aside 1 tablespoon of the basil oil for garnishing the stacks. Set aside the chopped basil leaves on the paper towels.

  2. Make the eggplant stacks: Preheat the grill to medium-high. Or, preheat an indoor stovetop grill.

  3. Trim the ends off the eggplants, then cut them into 24 slices that are a little less than 1/2-inch thick. Brush the eggplant slices on both sides with the basil oil and season with salt and pepper to taste. Grill the eggplant slices until they soften and are crisp around the edges, 7 to 8 minutes, turning once. Transfer the grilled eggplant to a platter.

  4. Preheat the oven to 400 degrees F.

  5. Cut the tomatoes into 12 slices, each about 1/3-inch thick, discarding the end slices or setting them aside for another use.

  6. For 12 short stacks, select 12 large slices of grilled eggplant and place them on a baking sheet. Spread each with 1/2 teaspoon of the reserved chopped basil. Top each with a slice of tomato and add a generous spoonful of feta cheese. Top the cheese with another eggplant slice and finish the stack with another heaping tablespoon of feta.

  7. Place the baking sheet in the oven and bake the stacks until the eggplant is warmed through and the feta has melted slightly, 6 to 7 minutes.

  8. To serve, place the eggplant stacks on a long platter, or place them on a bed of arugula on the platter. Drizzle the reserved 1 tablespoon basil oil over the stacks.


For taller stacks: Use additional eggplant, tomatoes, cheese, and basil to make them higher. They will take a little longer to heat through. And you will need to make more basil oil, too. It can be made up to 6 hours in advance and left at room temperature.

Roasted Butternut Squash

Roasted Butternut Squash

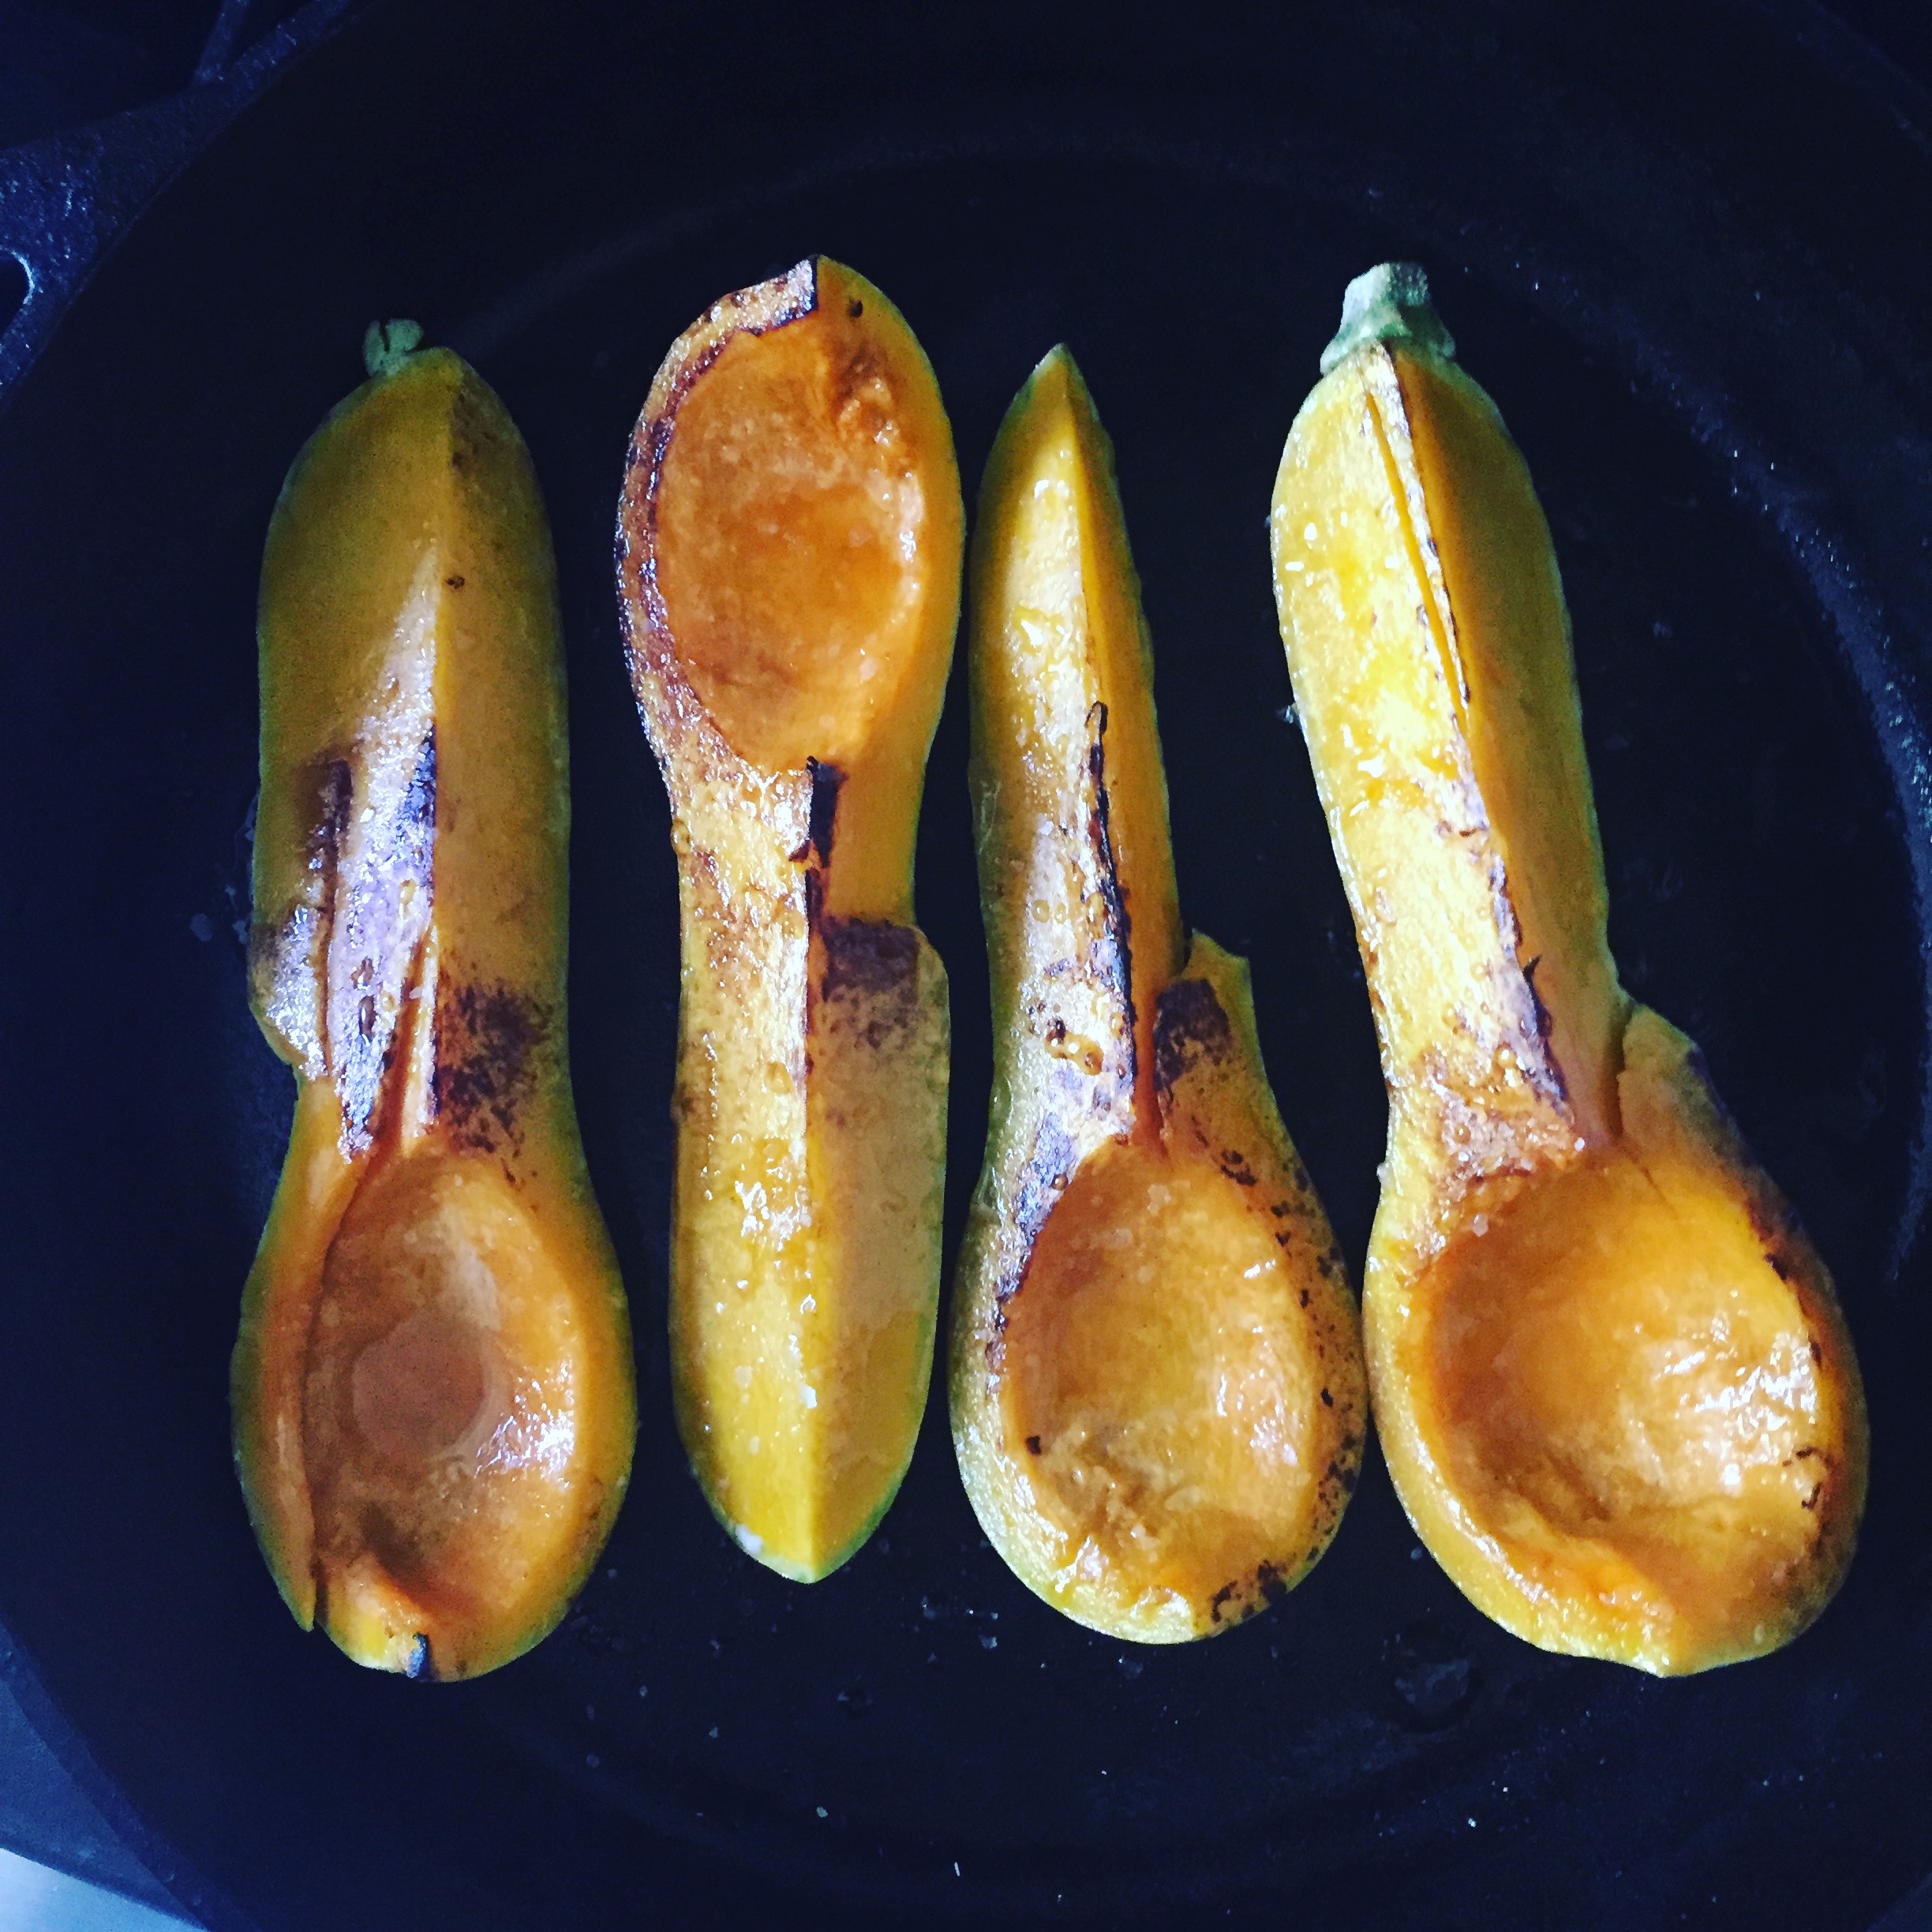
IMG_8628.JPG

Roasted winter squash like the butternut is so easy to prepare, you almost don’t need a recipe!

Wash the squash and cut trim off the stem end. With a heavy sharp knife, cut down through the squash to cut it in half lengthwise. With a soup spoon, scoop out the seeds and discard. Now comes the fun part - decide how you’re going to roast it. Will it be just the two halves, or do you slice again and cut each half into two quarters? Each quarter into two eighths?

This is as much an exercise in math as it is in cooking. And once the size is decided, think if you’re roasting on a sheet pan or in an iron skillet. If the former, then brush the wedges with oil, season as you like, pop in the oven and wait until browned. If the skillet, then heat a smidgeon of oil until hot, sear the squash cut-side down, then turn over for roasting to doneness in the oven.

One last thought - you can drizzle on something wonderful before the squash heads into the oven and out of your hands. Will it be honey, sorghum, or maple syrup? Will you drizzle with a little balsamic vinegar for depth and sweetness? Or will you get cozy and channel your grandmother and spoon on brown sugar, a bit of butter, and a sprinkle of cinnamon? So many delicious choices.


ROASTED BUTTERNUT SQUASH RECIPE:

Makes: 4 to 6 servings | Prep: 5 minutes | Cook: 35 to 40 minutes

1 large butternut squash (about 1 1/2 to 2 pounds)
Olive oil as needed
Kosher salt and freshly ground black pepper
Honey, sorghum, or maple syrup

  1. Place a rack in the center of the oven, and preheat the oven to 375 degrees F.

  2. Trim off the stem end of the squash. With a big, heavy chef’s knife, slice the squash in half lengthwise. Scoop out the seeds and discard. Place the halves on a sheet pan and brush with olive oil. Sprinkle with salt and pepper. Or, cut into quarters, brush with oil, and season. If using an iron skillet, heat the skillet until hot, drizzle in a teaspoon of oil, and sear the cut edges until browned. Season with salt and pepper.

  3. Turn the squash right side up, and drizzle honey, sorghum, or maple syrup into the well of the squash. Place the pan in the oven. Bake until the squash is tender when pierced with a fork, about 35 to 40 minutes, depending on the size.

  4. Serve warm or at room temperature. Or, let the squash cool and scoop the roasted squash into any recipe that calls for canned pumpkin.

Sheet Pan Roasted Okra

Sheet Pan Roasted Okra

southern_veggies_029.JPG

When okra comes into season there is no need to coat it with breading and fry in oil. Let the true flavor come to life by slicing lengthwise or into thirds or however you like, then tossing with olive oil, and a pinch of salt - not much - and roast at 400 degrees on a sheet pan until browned and tender.

Season at the end of the roasting process - this is important. Salting ahead of time tends to over-salt the vegetable, as salt magnifies in flavor when roasting. So I will add a pinch of sea salt when tossing with olive oil, then taste the okra when they come out of the oven. If they need more salt, you can add it. And add minced onion if you like to add a sweet caramelized contrast. Add halved cherry tomatoes at the end for that wonderful okra-tomato marriage. Just make sure to cook at a high enough heat so the okra browns and then run a metal spatula under it and transfer it to a platter for pre-dinner snacking or to accompany steaks and mashed potatoes.

And if you’re feeling fancy, add a handful of chopped fresh parsley or basil to the finished dish to dress it up, and grate over some nice Manchego cheese as an intentional way to season and garnish - ways we can rethink the way we cook veggies!


SHEET PAN ROASTED OKRA RECIPE:

Makes: 6 to 8 servings | Prep: 10 to 12 minutes | Cook: 10 to 13 minutes


1 pound small to medium okra
2 to 3 tablespoons olive oil
1 tablespoon minced onion, if desired
Pinch of Creole seasoning
1 cup halved cherry tomatoes
3 springs of fresh thyme, if desired
Salt and pepper to taste

  1. Place a rack in the center of the oven, and preheat the oven to 400 degrees.

  2. Trim the stem end cap from the okra. If okra are small, leave them whole. If they are medium to large in size, slice in half lengthwise or cut them on the diagonal into two to three pieces. Place the okra in a large mixing bowl, and toss with the oil, onion, and the Creole seasoning. Turn the mixture onto a rimmed half sheet pan, and spread out the okra so that it is in one layer. Place the pan in the oven.

  3. Roast the okra until it just begins to turn brown around the edges, about 7 to 8 minutes. Add the tomatoes to the pan, and add the thyme if desired. Continue to roast until the okra is turning golden brown, about 3 to 5 minutes more. Remove the pan from the oven, and season with salt and pepper while warm.

Homegrown Tomato Pie

Homegrown Tomato Pie

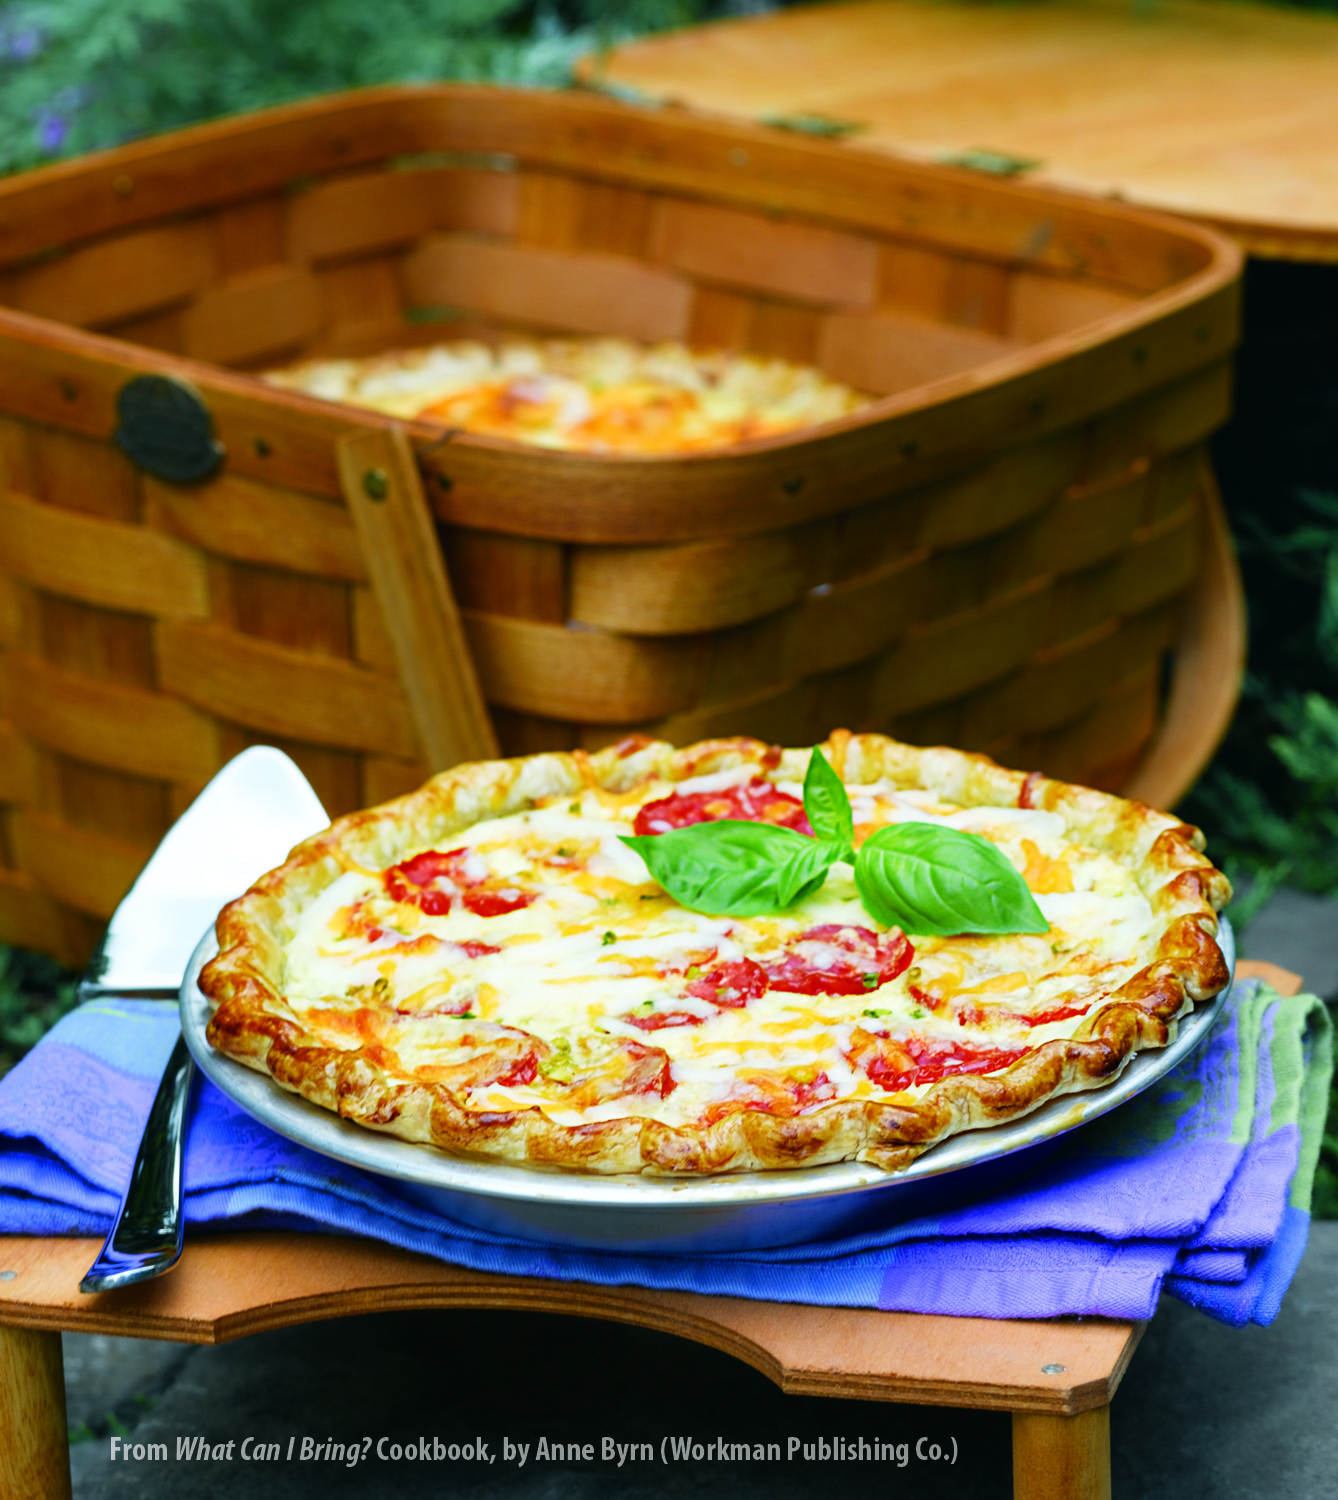
Fresh Tomato Pie photo.jpg

When summer’s ripe tomatoes come into season, I love to bake tomato pie.

Piled into a pie crust and topped with seasonings and cheese, tomato pie is the perfect appetizer, lunch, or dinner. It is today’s new quiche, a vibrantly flavored and colored one-pan meal. And just by doing something a simple a changing up the type of tomatoes, changes the look and feel of the pie.

For making the perfect tomato pie, first use the best tomatoes you can find. Use fresh basil, and if you love bacon, by all means, add it. This is a blueprint recipe I have used through the years, so feel free to change it up depending on what’s in your garden and pantry.

And just because it’s called a tomato pie, doesn’t mean you can make this recipe into smaller tarts or larger sheet pan pies. It’s super versatile, involving just a crust, tomato slices, filling, and your imagination!


HOMEGROWN TOMATO PIE RECIPE:
Makes: 6 to 8 servings | Prep: 25 minutes | Bake: 50 to 55 minutes

3 medium-size ripe tomatoes, peeled and cut into 15 to 16 slices
Kosher salt
1 pie crust (9 inches), thawed if frozen
1/2 cup torn fresh basil leaves
1/2 cup chopped green onions
1 cup (4 ounces) shredded mozzarella cheese
1/2 cup (2 ounces) shredded Cheddar cheese
3 tablespoons mayonnaise
Dash cayenne pepper

  1. Place a rack in the center of the oven and preheat the oven to 375 degrees F.

  2. Place the tomato slices on a baking rack placed over a sheet pan. Lightly salt the tomatoes and let them sit until they give up some of their juice, about 15 minutes.

  3. Prick the bottom and sides of the pie crust with a fork a few times. Bake the crust until it begins to brown, about 5 minutes. Let the crust cool for about 15 minutes. Leave the oven on.

  4. Pat the tomato slices dry with paper towels. When the crust has cooled, arrange half of the tomato slices in the bottom. Scatter half of the basil and green onions over them. Add the rest of the tomato slices and top with the remaining basil and green onions.

  5. Combine the mozzarella and Cheddar, mayonnaise, and cayenne in a small bowl. Spoon this mixture over the tomatoes and spread it out as evenly as you can.

  6. Bake the tomato pie until the crust has lightly browned, 30 to 35 minutes. Tent the top with a piece of foil to prevent overbrowning. Continue baking until the filling firms up, 10 to 15 minutes more. Remove from the oven and let cool 20 minutes before slicing.